tabs ใน ionicframework เราสามารถเลือกใช้งานได้จาก 2 วิธีคือ
การใช้ ion-tabs และ การใช้ css class
โดยเนื้อหาที่อธิบายจากอ้างอิงจากสองลิ้งค์นี้
โค้ดตัวอย่างและไฟล์ที่เกี่ยวข้อง จะขอใช้งานจากบทความก่อนหน้า ดูได้ที่
การใช้งาน ionicmodal ใน ionicframework ตอนที่ 10
https://www.ninenik.com/content.php?arti_id=560 via @ninenik
การใช้งาน tabs แบบที่ 1 ด้วย ion-tabs
iontabs นั้นเราจะใช้งาน โดยแบ่งหน้าที่จะแสดงออกเป็นแท็บเมนู เช่น เรามีไฟล์
welcome.html 1 ไฟล์ ต้องการแสดงแบบมีแท็บเมนู และเนื้อหาในไฟล์ welcome.html
เราจะใช้โค้ดเบื้องต้น ของ ion-tabs ดังนี้
ไฟล์ welcome.html วาโครงสำหรับใช้ tabs
1 2 3 4 5 6 7 8 9 10 11 12 13 14 15 | <ion-tabs class="tabs-assertive tabs-icon-only"> <ion-tab title="Home" icon-on="ion-ios7-filing" icon-off="ion-ios7-filing-outline"> <!-- Tab 1 content --> </ion-tab> <ion-tab title="About" icon-on="ion-ios7-clock" icon-off="ion-ios7-clock-outline"> <!-- Tab 2 content --> </ion-tab> <ion-tab title="Settings" icon-on="ion-ios7-gear" icon-off="ion-ios7-gear-outline"> <!-- Tab 3 content --> </ion-tab></ion-tabs> |
จากนั้น ในส่วจของ tab 1 content หรือเนื้อหาของแท็บ เราก็ใส่โค้ดหน้า
app ปกติที่เราใช้งานลงไปซึ่งประกอบไปด้วย header และ content ก็จะได้
หมายเหตุ: ห้ามนำ ion-tabs ไปวางไว้ด้านในของ ion-content เพราะจะทำ
ให้การแสดงผลผิดพลาดได้
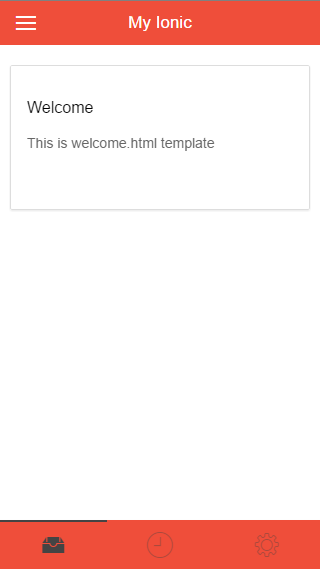
โค้ดไฟล์ welcome.html เบื้องต้นดังนี้
1 2 3 4 5 6 7 8 9 10 11 12 13 14 15 16 17 18 19 20 21 22 23 24 25 26 27 28 29 30 31 32 33 34 35 36 37 38 39 40 41 42 43 | <ion-tabs class="tabs-assertive tabs-icon-only"> <ion-tab title="Home" icon-on="ion-ios7-filing" icon-off="ion-ios7-filing-outline"> <!-- Tab 1 content --> <ion-header-bar class="bar bar-header bar-assertive"> <button menu-toggle="left" class="button button-icon icon ion-navicon"></button> <h1 class="title">My Ionic</h1> </ion-header-bar> <!-- กำหนด class ให้กับ ion-content กรณี มี header--> <ion-content class="scroll-content ionic-scroll has-header"> <div class="list card"> <div class="item item-body"> <h2>Welcome</h2> <p> This is welcome.html template <br> <br> <br> </p> </div></div> </ion-content> </ion-tab> <ion-tab title="About" icon-on="ion-ios7-clock" icon-off="ion-ios7-clock-outline"> <!-- Tab 2 content --> content tab 2 </ion-tab> <ion-tab title="Settings" icon-on="ion-ios7-gear" icon-off="ion-ios7-gear-outline"> <!-- Tab 3 content --> content tab 3 </ion-tab></ion-tabs> |
ดูตัวอย่าง
จะสังเกตเห็นว่า การใช้แท็บเมนูลักษณะนี้ จะเป็นการโหลดข้อมูลเข้ามาครั้งแรกพร้อมกัน และ
ข้อมูลในแต่ละแท็บเมนู จะใช้ $scope เดียวกัน
ข้อจำกัดคือเวลาใช้งาน จะต้องไปกำหนดทุกครั้งที่ต้องการใช้ หาก app ของเราต้อง
การให้มีแท็บเมนูทุกหน้า รวมทั้งมีความยืดหยุ่นน้อยกว่าการใช้งานในรูปแบบ css
การปรับแต่งการใช้าน ion-tabs สามารถทำได้โดยการใช้ css class ดังนี้
กำหนดสี
tabs-{ชื่อสีของ ionic} เช่น tabs-positive
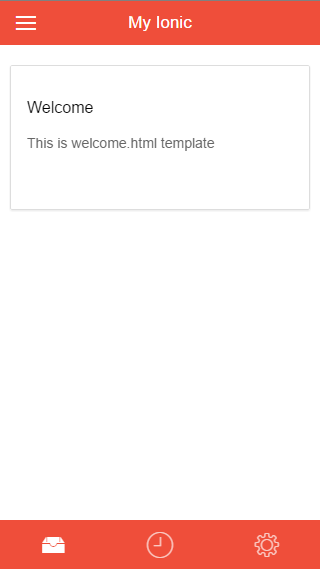
ให้แสดงเฉพาะ icon ไม่แสดงข้อควม
tabs-icon-only
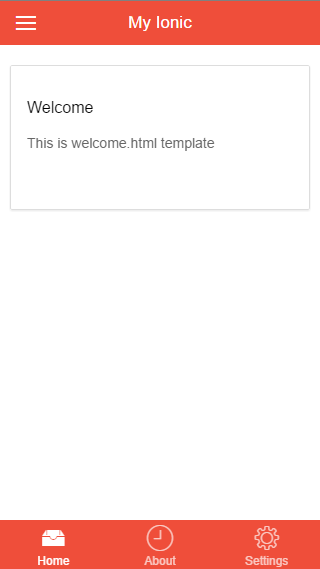
ให้แสดง icon และข้อความ โดยให้ icon อยู่ด้านบนของข้อความ
tabs-icon-top
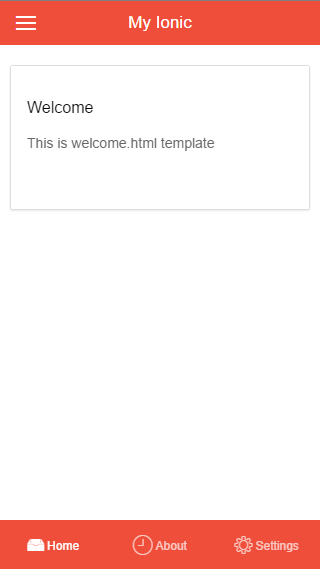
ให้แสดง icon และข้อความ โดยให้ icon อยู่ด้านซ้ายของข้อความ
tabs-icon-left
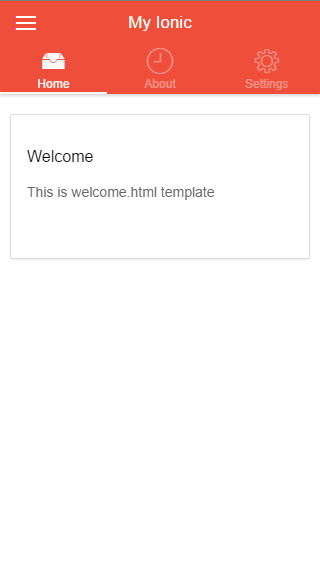
การกำหนดให้มีแถบคาดแท็บเมนู ที่กำลังใช้งานอยู่ หรือ active อยู่
tabs-striped
กำหนดสีพื้นหลังให้กับแท็บเมนู จะใช้คู่กับ tabs-striped
tabs-background-{ชื่อสีของ ionic} เช่น tabs-background-assertive
กำหนดสี จะใช้คู่กับ tabs-striped
tabs-color-{ชื่อสีของ ionic} เช่น tabs-color-balanced
ตัวอย่างการกำหนดและรูปประกอบ
1 | <ion-tabs class="tabs-assertive "> |
1 | <ion-tabs class="tabs-assertive tabs-icon-left"> |
1 | <ion-tabs class="tabs-assertive tabs-icon-top"> |
1 | <ion-tabs class="tabs-striped tabs-top tabs-icon-top tabs-background-assertive tabs-stable"> |
1 | <ion-tabs class="tabs-striped tabs-icon-only tabs-background-assertive tabs-color-dark"> |
การใช้งาน tabs แบบที่ 2 ด้วย css class
การใช้งาน และการกำหนด tabs แบบ css class ก็จะใช้รูปแบบตามที่อธิบายด้านบน
แต่จะไม่ได้มีการเรียกใช้งาน ion-tabs จะใช้แท็ก html ปกติเช่น div กำหนดราย
ละเอียดต่างของ tabs และจัดรูปแบบด้วย css class การแสดงข้อมูลจะใช้เป็นแบบ
ลิ้งค์ไปที่ไฟล์ หรือเรียกใช้ฟังก์ชั่น ng-click เพื่อทำงาน ต่างจาก ion-tabs ที่จะใช้
วิธีแสดงเนื้อหาแท็บเมนู ที่ถูกซ่อนไว้
รูปแบบแท็บเมนู ที่กำหนด้วย css class อย่างง่าย
1 2 3 4 5 6 7 8 9 10 11 12 13 14 | <div class="tabs"> <a href="#/" class="tab-item"> <i class="icon ion-home"></i> Home </a> <a href="#/aboutus" class="tab-item"> <i class="icon ion-ios7-clock"></i> About us </a> <a href="#/contactus" class="tab-item" > <i class="icon ion-star"></i> Contact us </a> </div> |
กรณีที่ต้องการใช้งาน tabs-striped เราจะต้องเพิ่ม div เข้าไปอีกขึ้นจะได้เป็น
1 2 3 4 5 6 7 8 9 10 11 12 13 14 15 16 | <div class="tabs-striped tabs-background-dark tabs-color-assertive"> <div class="tabs"> <a class="tab-item active" href="#/"> <i class="icon ion-home"></i> Home </a> <a class="tab-item" href="#/aboutus"> <i class="icon ion-ios7-clock"></i> About us </a> <a class="tab-item" href="#/contactus"> <i class="icon ion-star"></i> Contact us </a> </div></div> |
ตัวอย่างโค้ดการใช้งานในหน้า aboutus.html
1 2 3 4 5 6 7 8 9 10 11 12 13 14 15 16 17 18 19 20 21 22 23 24 25 26 27 28 29 30 31 32 33 34 | <ion-header-bar class="bar bar-header bar-assertive"> <button menu-toggle="left" class="button button-icon icon ion-navicon"></button> <h1 class="title">About Us</h1> <a nav-clear href="#/" class="button button-icon icon ion-home"></a></ion-header-bar> <!-- กำหนด class ให้กับ ion-content กรณี มี header--> <ion-content class="scroll-content ionic-scroll has-header"> <div class="list card"> <div class="item item-body"> <h2>About Us</h2> <p> This is aboutus.html template </p> </div></div> </ion-content> <div class="tabs tabs-assertive "><a href="#/" class="tab-item"> <i class="icon ion-home"></i> Home</a><a href="#/aboutus" class="tab-item"> <i class="icon ion-ios7-clock"></i> About us</a><a href="#/contactus" class="tab-item" > <i class="icon ion-star"></i> Contact us</a></div> |
การจัดวาง จะต่างจากการใช้งาน ion-tabs โดยจะวางไว้ด้านนอกของ
ion-content
การใช้งาน แบบ css class เราจำเป็นต้องกำหนดค่าต่างๆ เองเช่น
กำหนดลักษณะของแท็บเมนูที่ active กรณีใช้งานใน ion-view
ตัวอย่าง
มาดูรูปแบบการใช้งาน tabs แบบ css class แบบกำหนดให้ใช้กับทุกๆหน้า
โค้ดการจัดวางคู่กับการใช้งาน side menu และ ion-view ไฟล์ index.html
1 2 3 4 5 6 7 8 9 10 11 12 13 14 15 16 17 18 19 20 21 22 23 24 25 26 27 28 29 30 31 32 33 34 35 36 37 38 39 40 41 42 43 44 45 46 47 48 49 50 51 52 53 54 55 56 57 58 59 60 61 62 63 64 65 66 67 68 69 70 71 72 73 74 75 | <!DOCTYPE html><html ng-app="myIonicApp"> <head> <meta charset="utf-8" /> <meta name="format-detection" content="telephone=no" /> <meta name="msapplication-tap-highlight" content="no" /> <meta name="viewport" content="initial-scale=1, maximum-scale=1, user-scalable=no, width=device-width"> <link href="css/ionic.css" rel="stylesheet"> <script type="text/javascript" src="js/ionic.bundle.js"></script> <script type="text/javascript" src="app.js"></script> <title>My Ionic 3</title> </head> <body ng-controller="myIonicHome"> <ion-side-menus> <!-- Center content --> <ion-side-menu-content> <ion-nav-bar class="bar bar-header bar-assertive"> <ion-nav-back-button class="button-clear"> <i class="ion-arrow-left-c"></i> Back </ion-nav-back-button> </ion-nav-bar> <ion-nav-view animation="slide-left-right"> </ion-nav-view> <div class="tabs tabs-energized tabs-icon-top"> <a nav-clear href="#/" class="tab-item"> <i class="icon ion-home"></i> Home </a> <a nav-clear href="#/aboutus" class="tab-item"> <i class="icon ion-ios7-clock"></i> About us </a> <a nav-clear href="#/contactus" class="tab-item" > <i class="icon ion-star"></i> Contact us </a> </div> </ion-side-menu-content> <!-- Left menu --> <ion-side-menu side="left"> <ion-header-bar class="bar bar-header bar-assertive"> <h1 class="title">Menu</h1> </ion-header-bar> <ion-content> <div class="list"> <a nav-clear nav-clear menu-close class="item item-icon-left" href="#/"> <i class="icon ion-home"></i> Home </a> <a nav-clear menu-close class="item item-icon-left" href="#/aboutus"> <i class="icon ion-at"></i> About Us </a> <a nav-clear menu-close class="item item-icon-left item-icon-right" href="#/contactus"> <i class="icon ion-email"></i> Contact Us <i class="icon ion-ios7-telephone-outline"></i> </a> </div> </ion-content> </ion-side-menu> </ion-side-menus> </body></html> |
เนื้อหาเกี่ยวกับการใช้งาน tabs จะมีเพิ่มเติมในบทความต่อไป

 เนื้อหาที่เกี่ยวข้อง