จากเนื้อหาตอนที่แล้ว เราได้รู้จักแนวทางการตรวจสอบฟอร์ม ที่เราสร้างฟังก์ชั่นขึ้นมาใช้งานแล้ว ในเนื้อหาต่อไปนี้
จะขอเพิ่มเติมการใช้งาน รูปแบบการตรวจสอบ ที่มีมาให้ใน bootstrap ดูตัวอย่างได้ที่ DEMO 1 ท้ายบทความ
เนื้อหาตอนที่แล้ว
เทคนิคแนวทางตรวจสอบฟอร์ม form validation ใน bootstrap 4 อย่างง่าย http://niik.in/873
https://www.ninenik.com/content.php?arti_id=873 via @ninenik
สิ่งแรกที่ต้องทำคือ เพิ่ม property "novalidate" ให้กับ form โดย "novalidate" จะเป็นการยกเลิกการ
ตรวจสอบฟอร์มจาก browser มาเป็นตรวจสอบฟอร์มแบบกำหนดเอง และอีกส่วนคือ
กำหนด id เช่น "myform1" ไว้อ้างอิงเพื่อเรียกใช้งาน
1 2 3 | <form id="myform1" name="form1" method="post" action="" novalidate></form> |
และนี้คือรูปแบบ javascipt ที่เราใช้ผ่าน jquery เป็นดังนี้
1 2 3 4 5 6 7 8 9 10 11 12 | <script type="text/javascript">$(function(){ $("#myform1").on("submit",function(){ var form = $(this)[0]; if (form.checkValidity() === false) { event.preventDefault(); event.stopPropagation(); } form.classList.add('was-validated'); }); });</script> |
ต่อไป element ใดๆ ที่เราต้องการตรวจสอบ ให้เพิ่ม property "required" เข้าไป เช่น
1 2 | <input type="text" class="form-control" name="input_name" id="input_name"autocomplete="off" value="" required> |
และส่วนสุดท้ายของฟอร์ม ก็คือเพิ่ม ข้อความแจ้งเตือน กรณีที่ element นั้นๆ ไม่ผ่านเงื่อนไขการตรวจสอบ โดยจะ
ต้องเพิ่มต่อเข้าไป หลังจาก element ที่เรากำหนด "required" property ก็จะได้เป็น
1 2 3 4 5 | <input type="text" class="form-control" name="input_name" id="input_name"autocomplete="off" value="" required><div class="invalid-feedback">กรุณากรอกชื่อ นามสกุล</div> |
โดย Bootstrap จะใช้ class "invalid-feedback" เพื่อแสดงการแจ้งเตือนเมื่อไม่ผ่านการตรวจสอบ มาดูหน้าตาตัวอย่าง
ผลลัพธ์เบื้องต้นกัน

เมื่อเรากดปุ่ม ส่งข้อมูล โดยที่ยังไม่ได้กรอกข้อมูลที่จำเป็น ก็จะขึ้นแจ้ง พร้อมแสดงข้อความแจ้งเตือน ที่ถูกซ่อนเอาไว้
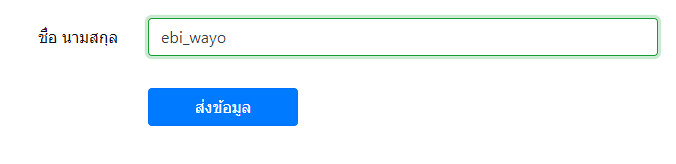
และเมือเรากรอกข้อมูล ก็จะทำให้ผ่านเงื่อนไขการตรวจสอบ ส่วนของ element นั้นๆ มีสถานะเป็น valid หรือผ่านการ
ตรวจสอบ อย่างเห็นได้ชัด ตามตัวอย่างรูปด้านล่าง
สมมติเราต้องการตรวจสอบเพิ่มเติม นอกจากค่าว่างหรือไม่ว่าง เราสามารถใช้ pattern สำหรับกรณีเป็น input type
( text, date, search, url, tel, email และ password )
มาประกรอบได้ ซึ่งถ้ามีความเข้าใจในการใช้งาน regular expression จะสามารถประยุกต์ส่วนนี้ได้เป็นอย่างดี ยกตัวอย่าง
เราต้องการให้ตรวจสอบว่ากรอกข้อมูลในรูปแบบมือถือ 10 หลักถูกต้องหรือไม่ด้วย ก็จะเป็นดังนี้
1 2 3 4 5 | <input type="text" class="form-control" pattern="^0([8|9|6])([0-9]{8}$)" name="input_tel" id="input_tel"autocomplete="off" value="" required><div class="invalid-feedback">กรุณากรอกเบอร์มือถือตัวเลข 10 หลัก</div> |
สมมติเรากรอกรูปแบบเบอร์มือถือไม่ถูกต้อง
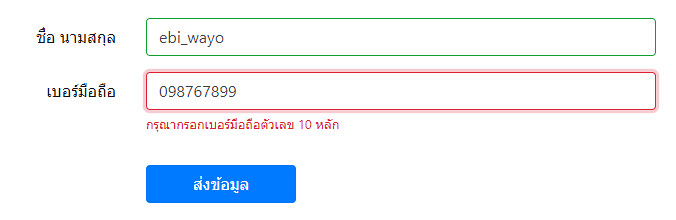
จะเห็นว่า จะไม่ใช่เพียงการตรวจสอบ ว่าเป็นค่าว่างหรือไม่เท่านั้น แต่ยังตรวจสอบรูปแบบของข้อมูลว่าตรงตามรูปแบบที่
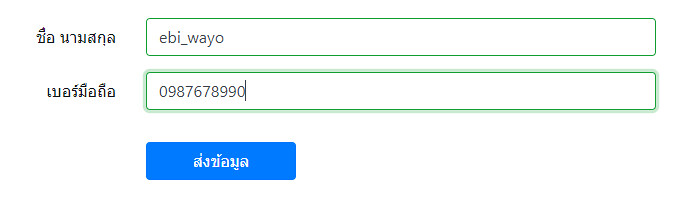
กำหนดใน pattern หรือไม่ เมื่อเรากรอกรูปแบบถูกต้อง ก็จะเป็นดังรูปด้านล่าง
ถ้ากรณีต้องการตรวจสอบอีเมล เราสามารถกำหนดด้วย pattern กับ input type="text" หรือ input type="email"
ตัวอย่างการใช้งานการตรวจสอบอีเมล
1 2 3 4 5 6 7 8 9 10 11 | <div class="form-group row"> <label for="input_email" class="col-sm-3 col-form-label text-right">อีเมล</label> <div class="col"> <input type="text" class="form-control" name="input_email" id="input_email" pattern="^[a-z0-9._%+-]+@[a-z0-9.-]+\.[a-z]{2,4}$" autocomplete="off" value="" required> <div class="invalid-feedback"> กรุณากรอกอีเมล </div> </div></div> |
ต่อไปกรณีสมมติเป็นตัวเลข OTP หรือเป็นตัวเลขอย่างเดียว อาจจะเป็น 5 หลักก็ได้ เราสามารถกำหนดเป็นดังนี้
1 2 3 4 5 6 7 8 9 10 11 | <div class="form-group row"> <label for="input_otp" class="col-sm-3 col-form-label text-right">รหัส OTP</label> <div class="col"> <input type="text" class="form-control" name="input_otp" id="input_otp" pattern="[0-9]{5}" autocomplete="off" value="" required> <div class="invalid-feedback"> กรุณากรอกรหัส OTP เป็นตัวเลข 5 หลัก </div> </div></div> |
อย่างไรก็ตาม กรณีที่จำเป็นที่ต้องกรอกข้อมุลเป็นตัวเลข ถ้าเป็นโหมดมือถือ การใช้งาน input type="number" จะทำ
ให้ผู้ใช้สะดวกในการกรอกข้อมูล เพราะแป้นมือถือจะเป็นตัวเลข ทำให้กรอกข้อมูลง่าย แต่ด้วยว่า pattern ไม่สามารถ
ใช้งานกับ type="number" ได้ หากจะใช้งาน เราจำเป็นต้อง เพิ่มเติม javascript เข้าไป มาดูตัวอย่าง
สมมติกรณีแรก กรอกตัวเลข ค่าตั้ง x-y โดย x คือค่าน้อยสุด และ y คือค่ามากสุด เราสามารถกำหนดเป็นดังนี้
1 2 3 | <input type="number" class="form-control" name="input_otp" id="input_otp"min="1" max="10"autocomplete="off" value="" required> |
จะผ่านเงื่อนไขนี้ ต้องกรอกตัวเลขค่าตั้งแต่ 1 แต่ไม่เกิน 10 ค่าใดก็ได้
ต่อมาแบบที่กรอกเป็นตัวเลข แต่มีการกำหนดจำนวนตัวอักษร เช่น กรณีเป็นรหัส OTP เป็นตัวเลข 5 หลัก ซึ่งหมายความ
ว่า เราสามารถกรอกเป็นตัวเลข 00000 - 99999 ในกรณีนี้ เราจำเป็นต้องใช้ javascript เข้ามาช่วยเพิ่มเติม คือ ห้ามกรอก
เกิน 5 ตัว และ ค่าต้องเป็นไปตามเงื่อนไข เราจะได้เป็นดังนี้
1 2 3 4 5 | <input type="number" class="form-control" name="input_otp" id="input_otp"maxlength="5"min="1" max="99999" oninput="this.value.length<this.maxLength?this.min=Math.pow(10, this.value.length):this.min=0"onkeypress="return (this.value.length>=this.maxLength)?false:true"autocomplete="off" value="" required> |
หากต้องการเปลี่ยนเป็น 6 ตัว ให้เราเปลี่ยนตรง maxlength="5" เป็น maxlength="6" และเปลี่ยนตรง
max="99999" ให้เป็น max="999999" หรือก็คือ มีเลข 9 เท่ากับ 6 ตัว
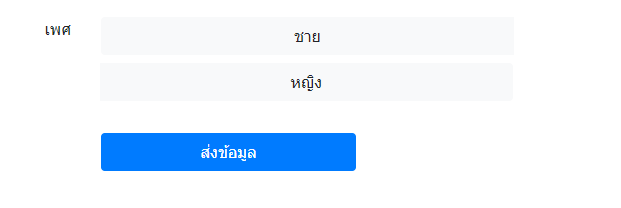
ต่อไปมาดูในส่วนของกรณีที่เป็น radio หรือ checkbox กันบ้าง โดยจะใช้งานคล้ายกัน จะยกตัวอย่างเฉพาะ radio
กรณีที่ต้องเลือกค่าใดค่าหนึ่งของ radio ก็จะกำหนดคล้าย input
คือเพิ่ม property "required" เข้าไป พร้อมกับกำหนด <div class="invalid-feedback">ข้อความแจ้ง</div>
เข้าไปต่อจาก label ของ radio ตัวสุดท้าย ยกตัวอย่าง
1 2 3 4 5 6 7 8 9 10 11 12 13 14 15 16 17 18 19 20 21 22 | <div class="form-group row"> <legend class="col-form-label col-sm-3 pt-0 text-right">เพศ</legend> <div class="col"> <div class="form-check"> <input class="form-check-input" type="radio" name="radio_gender" id="radio_gender_1" value="male" required> <label class="form-check-label" for="radio_gender_1"> ชาย </label> </div> <div class="form-check"> <input class="form-check-input" type="radio" name="radio_gender" id="radio_gender_2" value="female" required> <label class="form-check-label" for="radio_gender_2"> หญิง </label> <div class="invalid-feedback"> กรุณาเลือกเพศ </div> </div> </div></div> |
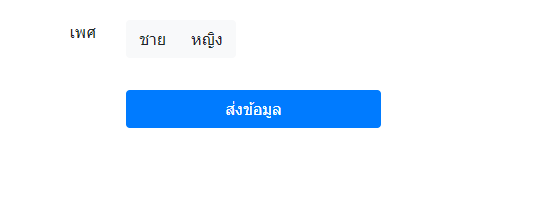
กรณีไม่ผ่านเงื่อนไข

กรณีผ่านเงื่อนไข

จำไว้เสมอว่า การกำหนด ตำแหน่งของ <div class="invalid-feedback"></div> ถ้าเราวางไว้ไม่ติดกับ element หรือ
ไม่ติดกับ label ตัวแจ้งอาจจะไม่แสดง
ส่วนของ textarea และ select ก็จะกำหนดคล้าย input ตัวอย่างดูได้ที่โค้ดเต็ม
1 2 3 4 5 6 7 8 9 10 11 12 13 14 15 16 17 18 19 20 21 22 23 24 25 26 27 28 29 30 31 32 33 34 35 36 37 38 39 40 41 42 43 44 45 46 47 48 49 50 51 52 53 54 55 56 57 58 59 60 61 62 63 64 65 66 67 68 69 70 71 72 73 74 75 76 77 78 79 80 81 82 83 84 85 86 87 88 89 90 91 92 93 94 95 96 97 98 99 100 101 102 103 104 105 106 107 108 109 110 111 112 113 114 115 116 117 118 119 120 121 122 123 124 125 126 127 128 129 130 131 132 133 134 135 | <!doctype html><html><head> <meta charset="utf-8"> <meta name="viewport" content="width=device-width, initial-scale=1, shrink-to-fit=no"> <title>Document</title> </head><body> <div class="container"> <br><form id="myform1" name="form1" method="post" action="" novalidate><div class="form-group row"> <label for="input_name" class="col-sm-3 col-form-label text-right">ชื่อ นามสกุล</label> <div class="col"> <input type="text" class="form-control" name="input_name" id="input_name" autocomplete="off" value="" required> <div class="invalid-feedback"> กรุณากรอกชื่อ นามสกุล </div> </div></div><div class="form-group row"> <label for="input_tel" class="col-sm-3 col-form-label text-right">เบอร์มือถือ</label> <div class="col"> <input type="text" class="form-control" pattern="^0([8|9|6])([0-9]{8}$)" name="input_tel" id="input_tel" autocomplete="off" value="" required> <div class="invalid-feedback"> กรุณากรอกเบอร์มือถือตัวเลข 10 หลัก </div> </div></div><div class="form-group row"> <label for="input_email" class="col-sm-3 col-form-label text-right">อีเมล</label> <div class="col"> <input type="text" class="form-control" name="input_email" id="input_email" pattern="^[a-z0-9._%+-]+@[a-z0-9.-]+\.[a-z]{2,4}$" autocomplete="off" value="" required> <div class="invalid-feedback"> กรุณากรอกอีเมล </div> </div></div><div class="form-group row"> <label for="input_otp" class="col-sm-3 col-form-label text-right">รหัส OTP</label> <div class="col"> <input type="number" class="form-control" name="input_otp" id="input_otp" maxlength="5" min="1" max="99999" oninput="this.value.length<this.maxLength?this.min=Math.pow(10, this.value.length):this.min=0" onkeypress="return (this.value.length>=this.maxLength)?false:true" autocomplete="off" value="" required> <div class="invalid-feedback"> กรุณากรอกรหัส OTP เป็นตัวเลข 5 หลัก </div> </div></div><div class="form-group row"> <legend class="col-form-label col-sm-3 pt-0 text-right">เพศ</legend> <div class="col"> <div class="form-check"> <input class="form-check-input" type="radio" name="radio_gender" id="radio_gender_1" value="male" required> <label class="form-check-label" for="radio_gender_1"> ชาย </label> </div> <div class="form-check"> <input class="form-check-input" type="radio" name="radio_gender" id="radio_gender_2" value="female" required> <label class="form-check-label" for="radio_gender_2"> หญิง </label> <div class="invalid-feedback"> กรุณาเลือกเพศ </div> </div> </div></div> <div class="form-group row"> <label for="textarea_address" class="col-sm-3 col-form-label text-right">ที่อยู่</label> <div class="col"> <textarea class="form-control" name="textarea_address" id="textarea_address" rows="3" required></textarea> <div class="invalid-feedback"> กรุณากรอกที่อยู่ </div> </div> </div> <div class="form-group row"> <label for="select_province" class="col-sm-3 col-form-label text-right">จังหวัด</label> <div class="col"> <select class="custom-select" name="select_province" id="select_province" required> <option value="">เลือกจังหวัด</option> <option value="กรุงเทพ">กรุงเทพ</option> </select> <div class="invalid-feedback"> กรุณาเลือกจังหวัด </div> </div> </div> <div class="form-group row"> <label for="input_zipcode" class="col-sm-3 col-form-label text-right">รหัสไปรษณีย์</label> <div class="col"> <input type="number" class="form-control" name="input_zipcode" id="input_zipcode" autocomplete="off" value="" min="10000" max="99999" required> <div class="invalid-feedback"> กรุณากรอกรหัสไปรณีย์ </div> </div></div> <div class="form-group row"> <div class="col-sm-3 offset-sm-3 text-right pt-3"> <button type="submit" name="btn_submit" id="btn_submit" value="1" class="btn btn-primary btn-block">ส่งข้อมูล</button> </div></div> </form> </div> <script type="text/javascript">$(function(){ $("#myform1").on("submit",function(){ var form = $(this)[0]; if (form.checkValidity() === false) { event.preventDefault(); event.stopPropagation(); } form.classList.add('was-validated'); }); });</script></body></html> |
ดูผลลัพธ์ได้ที่ DEMO 1
ก่อนจบ ขอเพิ่มบางกรณีเกี่ยวกับ checkbox ซึ่งโดยทั่วไปแล้ว เราจะกำหนดคล้าย radio แต่ลักษณะของ radio นั้น
คือเลือกอย่างใด อย่างหนึ่ง ก็จะเข้าเงื่อนไข แต่ของ checkbox ที่มีให้เลือกหลายรายการ และต้องเลือกอย่างน้อย
1 รายการ เมื่อเราใส่ property "required" เข้า จะกลายเป็นว่า เราต้องเลือกทุกรายการ ถึงจะผ่านเงื่อนไข ตามตัวอย่าง
ต่อไปนี้
1 2 3 4 5 6 7 8 9 10 11 12 13 14 15 16 17 18 19 20 21 22 | <div class="form-group row"> <legend class="col-form-label col-sm-3 pt-0 text-right">ความสนใจ</legend> <div class="col"> <div class="form-check"> <input class="form-check-input" type="checkbox" name="checkbox_hobby1" id="hobby1" value="การออกกำลังกาย" required> <label class="form-check-label" for="hobby1"> การออกกำลังกาย </label> </div> <div class="form-check"> <input class="form-check-input" type="checkbox" name="checkbox_hobby2" id="hobby2" value="อ่านหนังสือ" required> <label class="form-check-label" for="hobby2"> อ่านหนังสือ </label> <div class="invalid-feedback"> กรุณาเลือกความสนใจ </div> </div> </div></div> |
กรณีลักษณะนี้ เราจำเป็นต้องเพิ่มหรือประยุกต์เพิ่มเต็ม เพื่อให้การตรวจสอบฟอร์มของ bootstrap ทำงานได้
โดยเราต้องการให้ เมื่อเลือกอย่างน้อย 1 รายการ ก็ให้ผ่านเงื่อนไข เทคนิคที่เราจะใช้คือ เพิ่ม class "required"
1 2 | <input class="form-check-input required" type="checkbox"name="checkbox_hobby1" id="hobby1" value="การออกกำลังกาย" required> |
เข้าไป ในกลุ่มของ checkbox นั้น จากนั้น ใช้ jquery ตรวจสอบว่า ถ้ามีการเลือกแล้วอย่างน้อย 1 รายการ
ให้ทำการเอา property "required" ออก เราก็จะได้ในส่วนของ javascript เป็นดังนี้
1 2 3 4 5 6 7 8 9 10 11 12 13 14 15 16 17 18 19 20 21 22 23 24 25 26 | <script type="text/javascript">$(function(){ var checkbox_required = false; $(":checkbox.required").on("click",function(){ var is_checked = $(this).prop("checked"); if(is_checked){ $(":checkbox.required").prop('required',false); checkbox_required = true; }else{ if($(":checkbox.required:checked").length==0){ checkbox_required = false; $(":checkbox.required").prop('required',true); } } }); $("#myform1").on("submit",function(){ var form = $(this)[0]; if (form.checkValidity() === false || checkbox_required===false) { event.preventDefault(); event.stopPropagation(); } form.classList.add('was-validated'); }); });</script> |
ตัวอย่างโค้ดแบบเต็ม
1 2 3 4 5 6 7 8 9 10 11 12 13 14 15 16 17 18 19 20 21 22 23 24 25 26 27 28 29 30 31 32 33 34 35 36 37 38 39 40 41 42 43 44 45 46 47 48 49 50 51 52 53 54 55 56 57 58 59 60 61 62 63 64 65 66 67 68 69 70 71 72 73 74 75 76 77 78 79 80 81 82 83 84 | <!doctype html><html><head> <meta charset="utf-8"> <meta name="viewport" content="width=device-width, initial-scale=1, shrink-to-fit=no"> <title>Document</title> </head><body> <div class="container"> <br><form id="myform1" name="form1" method="post" action="" novalidate><div class="form-group row"> <label for="input_name" class="col-sm-3 col-form-label text-right">ชื่อ นามสกุล</label> <div class="col"> <input type="text" class="form-control" name="input_name" id="input_name" autocomplete="off" value="" required> <div class="invalid-feedback"> กรุณากรอกชื่อ นามสกุล </div> </div></div><div class="form-group row"> <legend class="col-form-label col-sm-3 pt-0 text-right">ความสนใจ</legend> <div class="col"> <div class="form-check"> <input class="form-check-input required" type="checkbox" name="checkbox_hobby1" id="hobby1" value="การออกกำลังกาย" required> <label class="form-check-label" for="hobby1"> การออกกำลังกาย </label> </div> <div class="form-check"> <input class="form-check-input required" type="checkbox" name="checkbox_hobby2" id="hobby2" value="อ่านหนังสือ" required> <label class="form-check-label" for="hobby2"> อ่านหนังสือ </label> <div class="invalid-feedback"> กรุณาเลือกความสนใจ </div> </div> </div></div><div class="form-group row"> <div class="col-sm-3 offset-sm-3 text-right pt-3"> <button type="submit" name="btn_submit" id="btn_submit" value="1" class="btn btn-primary btn-block">ส่งข้อมูล</button> </div></div> </form> </div> <script type="text/javascript">$(function(){ var checkbox_required = false; $(":checkbox.required").on("click",function(){ var is_checked = $(this).prop("checked"); if(is_checked){ $(":checkbox.required").prop('required',false); checkbox_required = true; }else{ if($(":checkbox.required:checked").length==0){ checkbox_required = false; $(":checkbox.required").prop('required',true); } } }); $("#myform1").on("submit",function(){ var form = $(this)[0]; if (form.checkValidity() === false || checkbox_required===false) { event.preventDefault(); event.stopPropagation(); } form.classList.add('was-validated'); });});</script></body></html> |


 เนื้อหาที่เกี่ยวข้อง